October 10, 2015

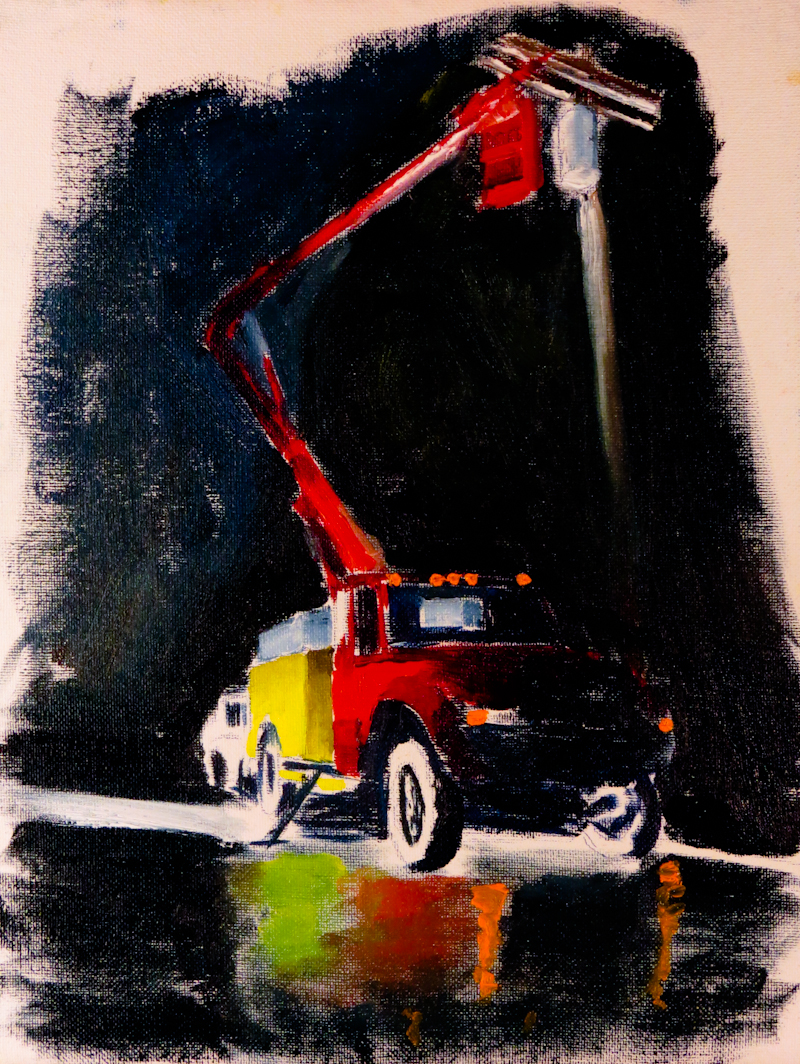
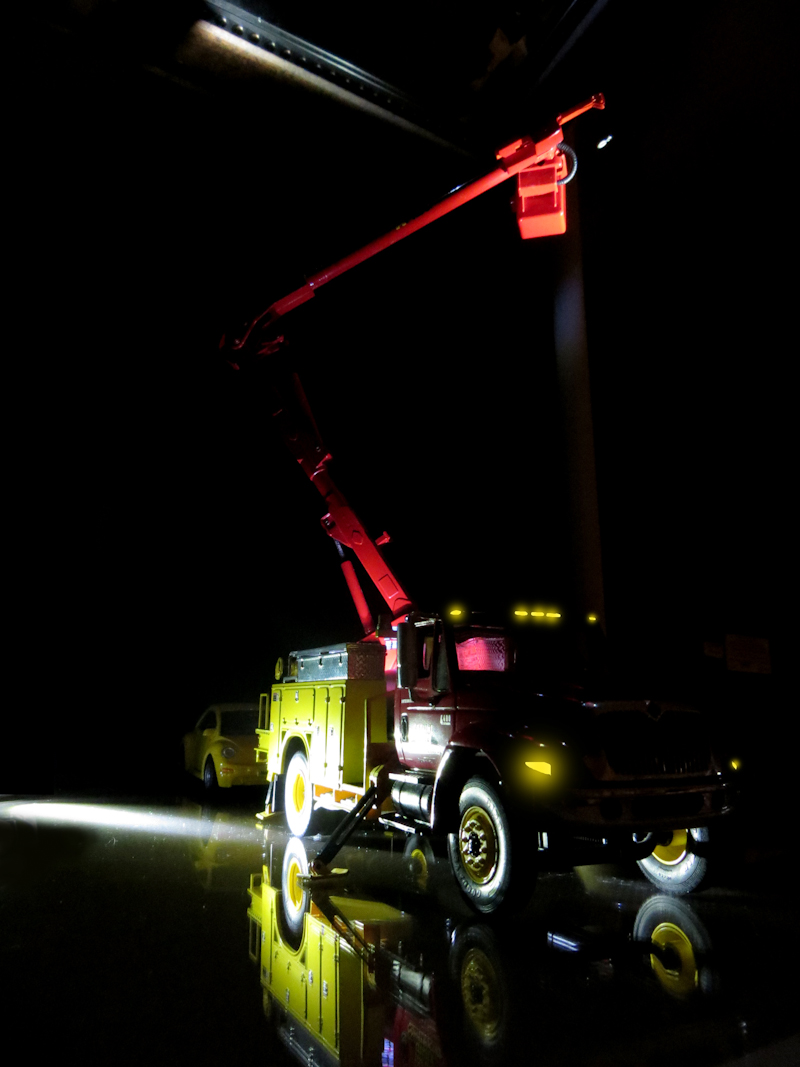
My thumbnail for Linemen Working was promising enough to move directly to a 22″ x 28″ canvas. Since the scene is a nocturne, I decided to cover the entire canvas with dark Golden Acrylic before starting. It may be a bit hard to see in the photo below, but the upper left corner is lighter and bluer where the sky is visible, while the trees and road are black. I used Mars Black and Prussian Blue for the background.

IMG_2351

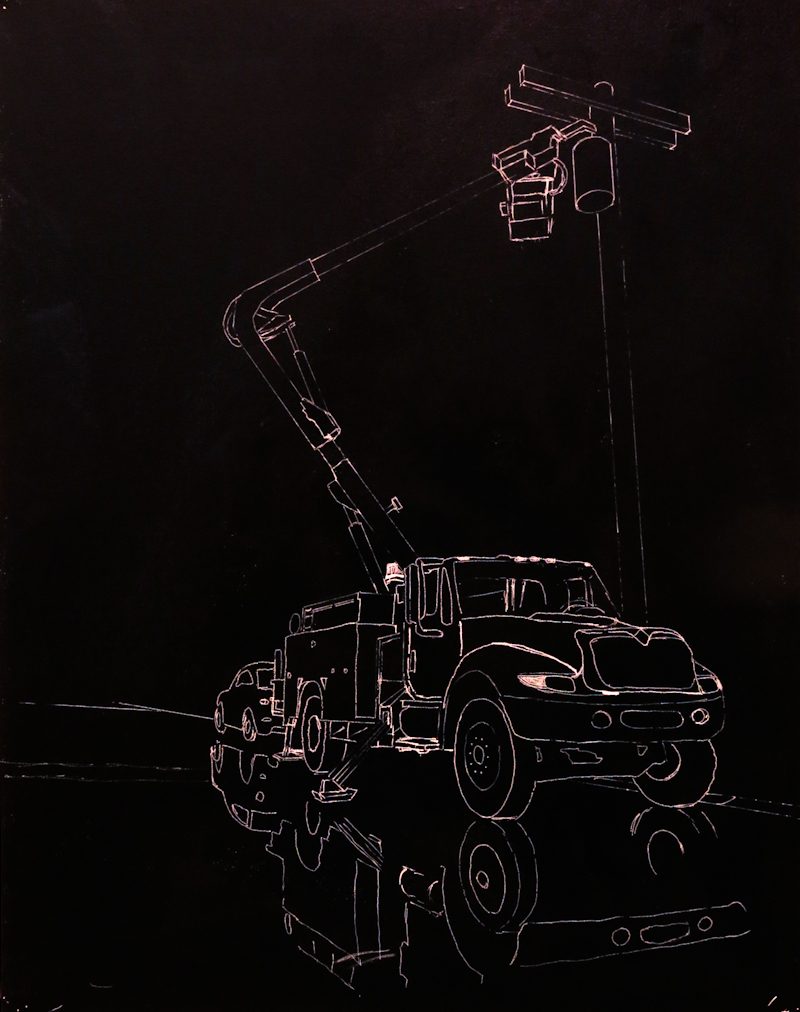
I tried transferring the drawing with a Canary Yellow Prismacolor pencil, but found that it wouldn’t stick to the relatively slick acrylic paints. In the end I used an extra fine Shock White Montana Acrylic Marker.

Linemen Working

Here’s my latest painting obsession: linemen working through the night to restore power after a storm. The truck is a 1:34 scale die cast from First Gear. It’s about 7 inches long and the bucket extends about a foot upward. The model sits on a piece of clear acrylic which approximates the reflections on the wet road. Lighting is from two LED headlamps and a small LED button light which sits in the back of the truck. The running lights were added in Photoshop. I’ll probably make a telephone pole out of dowel and balsa and then add some broken tree branches.

Once I get the scene designed and looking good in the camera, the plan is to drag the easel over and paint it from direct observation. Technically speaking it will be a still life, but my intention is to make it look fairly realistic, while dialing up the drama.

IMG_2302_Edited2

October 2, 2015

I finally got a chance to work on the peaches again and it’s about time because they are getting pretty ripe. This time I decided to mix things up and paint the peaches before painting the plate. My previous attempts have been fairly dark with the chiaroscuro dial turned all the way up to eleven. For this painting I’m going for a higher key design with more atmospheric volume and warmth in the shadows. My plan is to paint the plate and the shadows with the same value scheme as can be seen in the under painting.

IMG_2266-2

Bennington Peaches IV

I started a new Bennington Peaches painting. The previous iteration still needs another session or two, but it is has some drawing and compositional issues that I felt would be easier to address in a new painting.

IMG_2141

The peaches in this painting are fuller and really crowd the plate. The outlines of the peaches and their form shadows are more interesting and more specific. The previous painting started out more like this one, but the peaches shrank and became less specific as I worked on them. I will finish the earlier painting to get some practice painting the peaches and then apply what I learned to this painting.

September 20, 2015

Tonight I painted the plate with its pattern of blue splotches and then added some thin color to the underpainting of the peaches. It always amazes me how different the painting is from its underpainting. In the next session, I will paint the peaches closer to their final form and then finish the tabletop.

IMG_2139

The base color for the plate was a neutral mixture of Prussian Blue, Permanent Alizarin Crimson, Cadmium Yellow, and Titanium White. The spots used the same colors, but almost no yellow.

For this study, I first painted a neutral plate in shadow and light and then went back and added the blue splotches on top of the wet paint. As I suspected, this approach worked better than starting with a blue plate and painting neutral around the spots.

Bennington Peaches III

My first project with the new still-life stand was another Bennington Peaches study. Zip-ties hold a mirror that gives me a perfect top-down view of the peaches on the blue plate.

IMG_2126

Here’s the underpainting on an 8″ x 8″ stretched canvas.

IMG_2120

I started by covering the canvas with a random pattern of middle value acrylic colors, including French Ultramarine, Burnt Sienna, and Burnt Umber, all lightened with Titanium White. I also painted the sides of the canvas with black acrylic paint.

When this was dry, I started the oil underpainting using water miscable oils. First I established the outlines of the peaches, the plate, and the core and cast shadows using Burnt Sienna. I then painted in the shadows using a combination of Prussian Blue, Terra Verte, and Burnt Sienna. A final step was to lightened the table with a bit of Titanium White.

Adjustable Still-Life Stand

After a brainstorming session with my classmate Chris, I managed to put together an inexpensive, adjustable still-life stand. My goal was to provide a fairly large tabletop whose height could be easily adjusted. Since I stand when I paint and I’m pretty tall and often paint scenes at eye-level (see this onion painting), it was important that the table could be positioned six feet or more off the ground. I also wanted the ability to clamp on lights and easily hang backdrops. Here’s what I came up with.

IMG_2122

It’s based on a inexpensive plastic shelving unit with PCV pipes replacing some of the risers.

IMG_2099

The PVC pipes are small enough that the shelf can slide freely up and down. The shelf rests on pipe clamps that can be loosened and tightened with a screwdriver.

IMG_2106

PVC bushings mate the pipes to the fixed shelves.

IMG_2105

The system seems pretty versatile and I can easily reassemble it in other configurations.

Bennington Peaches II

My peaches watercolor was pretty successful so I tried a similar composition in oils. It’s an 8″ x 10″ canvas panel with water miscible oils.

IMG_1949

Since the goal was a quick study, I chose to reuse a panel which had previously been painted a solid, dark burnt umber. This turned out to be a mistake – starting with such a dark support made it really hard to establish the proper values and I found that the painting was too dark for much of the time.

The texture on the plate was more successful in the watercolor. When creating the oil sketch, I first painted a solid blue plate, with dark blue shadows and a gradient from dark into light. Then I painted the white areas around the blue spots.

The next time I try this plate, I will start with a neutral color gradient in grays from dark to light and then I will add the blue spots. I think this will be easier and will lead to a more natural looking texture with better light and shadow effects.

A final note is that I overdid the chiaroscuro effect on the peaches. For the next go around, I will use a neutral toned panel and try to go for less contrast.