ImagOn Lamination Tip

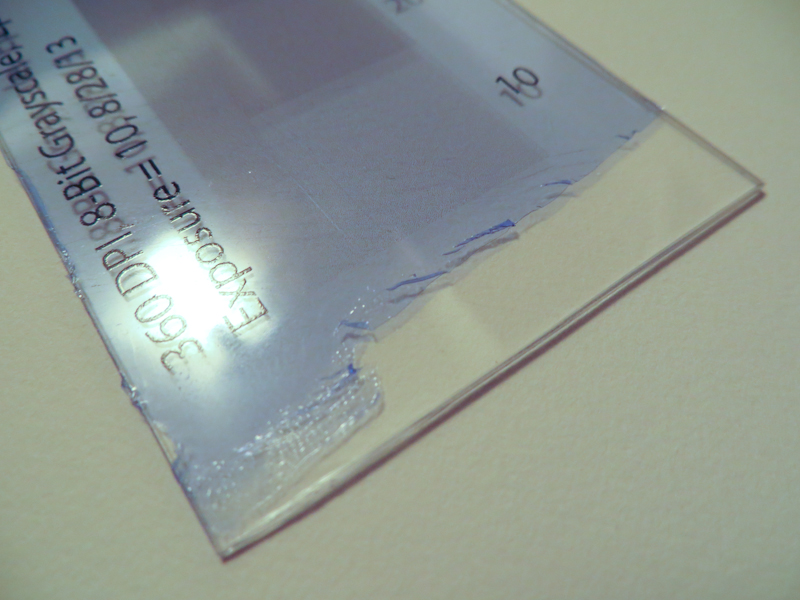
I got a little carried away with the hair dryer while making this test plate and ended up fusing the protective plastic layer to the ImagOn emulsion. When it was time to print the design onto the plate, I was unable to separate the protective layer from the emulsion until I peeled the both up off of the plate and used two pieces of tape, one on top of the plastic and one on the underside of the emulsion, to peel the protective layer away. I wish I could get the emulsion to stick to the plate the way it stuck to the plastic!

Anyway, lesson learned – don’t overheat the plate after laminating.

A better way to transfer drawings to linoleum

One challenge I’ve encountered with linocut prints is transferring my design to the block of linoleum. In the past I’ve used Saral and Richeson transfer papers, but I was never happy with the amount of detail that would be lost as I traced my design with a ball point pen. I’d read about ways to transfer a laser print or photocopy directly using nail polish remover or ChartPak blending markers as a solvent, but I never managed to get these methods to work, probably because the toner or the solvents have been reformulated.

Today I stumbled upon another technique which is simple, seems foolproof, and really works. The idea is to use an inkjet printer on a piece of slippery, non-absorbant paper. Since the ink doesn’t soak into the paper, it can be easily transferred onto another surface. McClain’s actually sells special paper that works this way, but it turns out you can get the same effect with freezer paper from your local supermarket. Here’s an outline of the process:

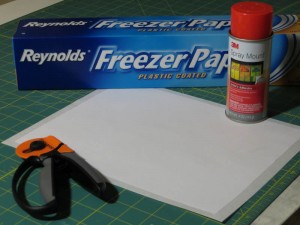
Before printing, I used spray adhesive to glue the freezer paper to a piece of regular printer paper. This adds a bit of stiffness to prevent curling and it gives the printer a bit more traction.

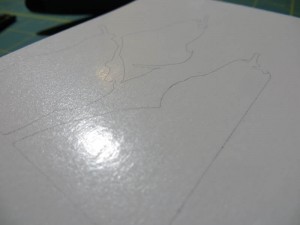
This is the freezer paper right after it came out of the printer. The lines are crisp and I had no problems with smearing or jamming.

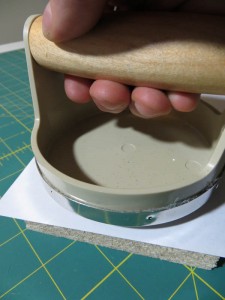
I used my inexpensive Speedball baren to transfer the wet ink from the freezer paper to the linoleum.

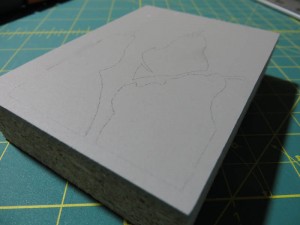
The fine lines transferred perfectly and they seem fairly robust. I attempted to wipe away a line on the left side of the block immediately after the transfer and it only smudged a bit.


Platemaking with Paper Stencils

I found a really great way to make SolarPlate relief plates using paper stencils. For weeks I had been trying to develop a process that would allow me to make really crisp and clean relief plates with fine details. After many weeks of experimentation, I had managed to make a couple of excellent plates from negatives made out of glass covered with black adhesive vinyl. These negatives worked because the flat nature of the glass ensured perfect contact with the plate during exposure and the opaque black vinyl on the clear glass gave me super-high contrast.

While I was thrilled to be able to make these plates, I was a little disappointed because the process was complex and expensive and required lots of time with my mind outside of the artistic space as I scanned my artwork, adjusted it in Photoshop, converted edges to vectors in Illustrator, cut the vinyl with a Silhouette craft cutting machine, and transferred the vinyl to glass using special adhesive transfer paper. The plates were beautiful, but I felt like a technician and the process was stressful and riddled with opportunities for failure at every step.

My breakthrough came while touring the Nikki McClure exhibit at the Bellevue Arts Museum. Nikki specializes in papercut and the gallery was full of these beautiful, intricate works that looked just like prints, but were each cut from a single sheet of black paper. I realized that afternoon that I could dispense with the scanner, computer, and craft cutter if I picked up an X-ACTO knife and cut the paper by hand.

It wasn’t until I made my first plate from a paper stencil that I understood the true benefits of the approach. The paper stencils are great for reducing costs, but the approach really shines because it keeps me in the artistic space the entire time and the simplicity and fluidity of the process allows me to rapidly try out ideas and visualize the results as I go.

The reason it works so well is that paper is easy to cut and as I cut the negative I get a paper positive which gives me a pretty good idea of what the print will look like as I am working. I can easily rework an area or even cut a new piece if I make a mistake. With no risk of destroying the plate, I am free to try out different compositions, edge contours, and cutting styles – you name it – I can try it quickly and easily.

Then, once I get something I am really happy with, I can make a plate and I get to keep the positive to hang on the wall. The prints from the plate are hand-made original artist prints, but now I have this even more original, hand-made master stencil to admire. I also have the satisfaction of knowing that the entire process involved my direct touch instead of the cold hand of a computer.

An added benefit is that I don’t have to paint the original artwork. Don’t get me wrong – I really enjoy painting, but much of the emphasis in relief printmaking is on the edges of the shapes – not the interiors. When painting a flat image in gouache, some of the time goes into the edge work, but a lot of it is spent massing in the shapes. When cutting a paper stencil, you only pay for the edges and you get the masses of the shapes for free.

I think this approach has huge potential for learning design for printmaking – it teaches simplification and you can use it to prototype a multi-plate color print before going to the time and expense of creating the plates. Even if you are working in linoleum or wood block, it is nice to try out an intricate idea before committing.
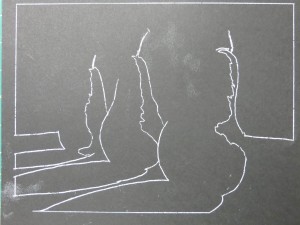
The first step is draw the image directly on black paper or copy it with transfer paper. I use a white chalk pencil or white transfer paper because it is easy to see, but graphite transfer paper has the advantage of not being as visible in case you want to clean up the positive stencil to save as another piece of original art. I used Strathmore Artagain paper because it is thin, making it easy to cut and smooth enough to give good contact with the plate during exposure.
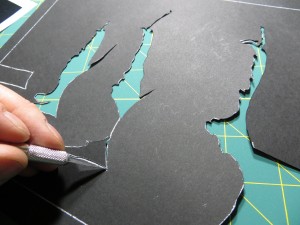
I use an X-ACTO knife to cut the stencil. This photo shows a knife that tightens at the bottom near the blade. The Gripster version of the knife that tightens at the top is much better for this sort of work because the blade won’t unscrew as the knife goes around sharp curves.
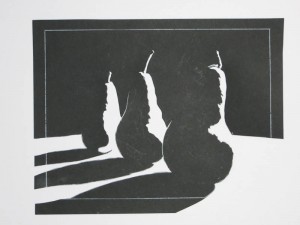
Cutting the stencil is a two-for-one proposition since you get the parts to make two stencils – one negative, and the other positive. The negative stencil is used to expose the plate. The positive stencil gives you a realtime preview of the final printed image, allowing you to make creative decisions as you cut. In the end you get a printing plate and a one-of-a-kind stencil suitable for framing.
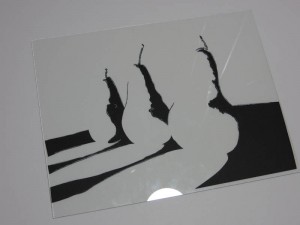
Once the stencil is cut, the negative portions are glued to a piece of glass using a gluestick. It is important to use a piece of glass that is slightly larger than your plate so that the edges of the glass don’t cast shadows on the plate during exposure. I use glass from inexpensive 8.5″ x 11″ document frames. You can get these frames for about $3 at places like Walmart.
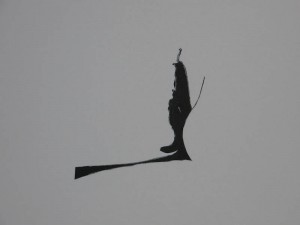
Another benefit of paper stencils is that you can recut individual portions of the negative if you make a mistake or just want to try another idea.
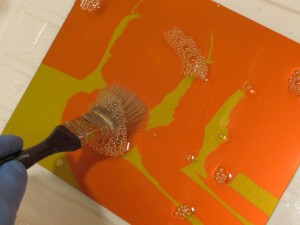
The last step is to expose and develop the plate. The stencil is perfectly flat and very high contrast, so it is easy to get a perfect exposure. Be sure that the paper-side of the glass is in contact with the plate during exposure.

 

Dreaming of a White Christmas

This week we started to render white spheres in charcoal. The timing couldn’t have been better because Christmas ornaments just went on sale at Bartells. Christmas ornaments make excellent drawing spheres because:

  • They are inexpensive and widely available. I got six for about $3.
  • They come in a wide variety of sizes.
  • They are very round and smooth. I recommend getting the frosted ones instead of the reflective ones because they hold paint better.
  • They come with a hanging hook that is useful when applying spray paint.

Here are some painting tips:

  1. Use Killz Stain Blocking Primer in the spray can. This primer has a matte finish and is opaque enough to cover up any ornament color. If you have a transparent ornament, you will need at least two coats to prevent light from passing through and diluting the core shadows.
  2. Hang the ornament from a string.
  3. Wind the ornament up on the string and let it spin.
  4. Spray from a distance while the ornament spins. If you are careful, you can get a completely smooth coat.
  5. Leave ornament hanging by its string until it is dry.

Dramatic Shadows

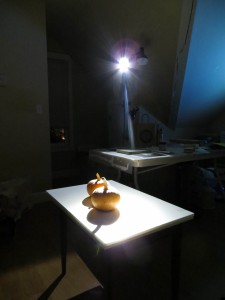
People have asked me how I got the dramatic shadows in the pumpkin notans. The key was to use a very small, almost point source light at a distance and eliminate ambient room light. I used an LED headlamp about 6 feet away from the pumpkins. The LED headlamp is a great light source for chiaroscuro because it has only a single LED and it is pretty bright, even at a distance. By turning off the room lights, I was able to eliminate most ambient light and this intensified the blacks of the shadows.

I found the most successful arrangements where those where the subject was mostly backlit, with a bit of intense light peeking around the edge. Once the light is positioned, it helps to choose a background that contrasts with the lighting on the subject. I often used a split background with white to accentuate the edges in shadow and black to bring out the illuminated edges.

When working with dramatic lighting, the room tends to get pretty dark so you either need to work from photos or use one of those clip-on booklights on your drawing board.

An LED headlamp in a darkened room makes dramatic shadows.

Ergonomic Magnets

If you have a magnetic drawing board, you may have run into trouble removing the super-strong rare-earth neodymium disc magnets. The problem is that they are small and hard to grip. I solved this problem by gluing wooden discs to the magnets. The wooden discs are slightly larger than the magnets, making them easy to pick up and fun to place. Here are some tips for making these ergonomic wonders:

  1. You can buy wooden discs of various sizes at Michael’s. Buttons would probably work well and look great!
  2. You will find your magnets to be more enjoyable if you glue them with their magnetic poles facing in the same direction. This allows you to stack them for storage and keeps them from fighting with each other.
  3. Epoxy works well for gluing the wood to the magnets. One of the ironies of epoxy is that it is very slippery until it sets. If you don’t somehow clamp the magnets to the wooden discs, they will slide around. A great, hassle free way to prevent the magnets from moving while the epoxy dries is to sandwich the wooden discs between the magnets and a roofing shingle. The magnets grip the metal through the wood and stay in place.
  4. I have had some trouble with the epoxy failing to adhere to the magnets. To minimize this problem it helps to rough up the magnets with some sandpaper before applying the epoxy.
  5. Make lots of magnets. They are tactile and fun to play with and you can never have enough.


Magnetic Drawing Board

There is something about classical art that seems to attract the artist-inventor. Every day in the Atelier, I work side by side with modern day Renaissance men and women whose inventions never cease to amaze me. One of my favorites is Ulan Moore’s magnetic drawing board which incorporates a thin sheet of steel so that drawings can be easily positioned and held in place with magnets. Say good bye to masking tape, push pins, and bulldog clips. Ulan’s solution is elegant and it’s fun to use.

In the Atelier, we’re always in the middle of a bunch of projects, so it is nice to have lots of drawing boards. I wanted four, but I didn’t want to spend a lot of money and I wanted instant gratification, so I set out to improve Ulan’s design with four goals in mind:

  • Drive the cost down.
  • Reduce the weight.
  • Eliminate the need to cut sheet metal and foam core.
  • Use widely available, materials off the shelf.

After a trip to Home Depot and Michael’s, I came up with a design that can be assembled in 15 minutes for under $15. The key to the reduced cost, weight, and assembly time is the use of four galvanized steel shingles instead of one large sheet of steel. The shingles are widely available and inexpensive – a 5″ x 8″ shingle costs $0.62 while an 8″ x 12″ shingle will set you back about a buck. I was able to simplify assembly and reduce costs further by sandwiching the shingles between standard-sized 20″ x 30″ foam core and presentation board.

Supply List

4 Galvanized steel roofing shingles. Home depot $2.48
1 Elmer’s half inch thick foam core, 20” x 30” Michael’s $4.99
1 Strathmore 400 presentation board, 20” x 30” Michael’s $4.99
Glue or double-sided tape
Electrical tape
Newsprint

Directions

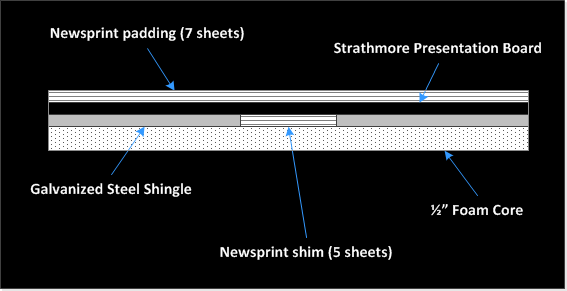
The drawing board is made up of four layers, with the foam core at the foundation for stiffness. The steel shingles are glued to the top of the foam core. The shingles don’t cover the entire 20″ x 30″ surface of the foam core. In order to ensure the drawing board is perfectly smooth, the spaces between the shingles are filled with newsprint shims. I found I needed about 5 layers of newsprint to match the thickness of the shingles. The next layer is a piece of Strathmore Presentation board. The presentation board holds the shingles in place and smooths out any gaps between the shingles and the newsprint shims. The board is topped off with 7 sheets of newsprint padding.

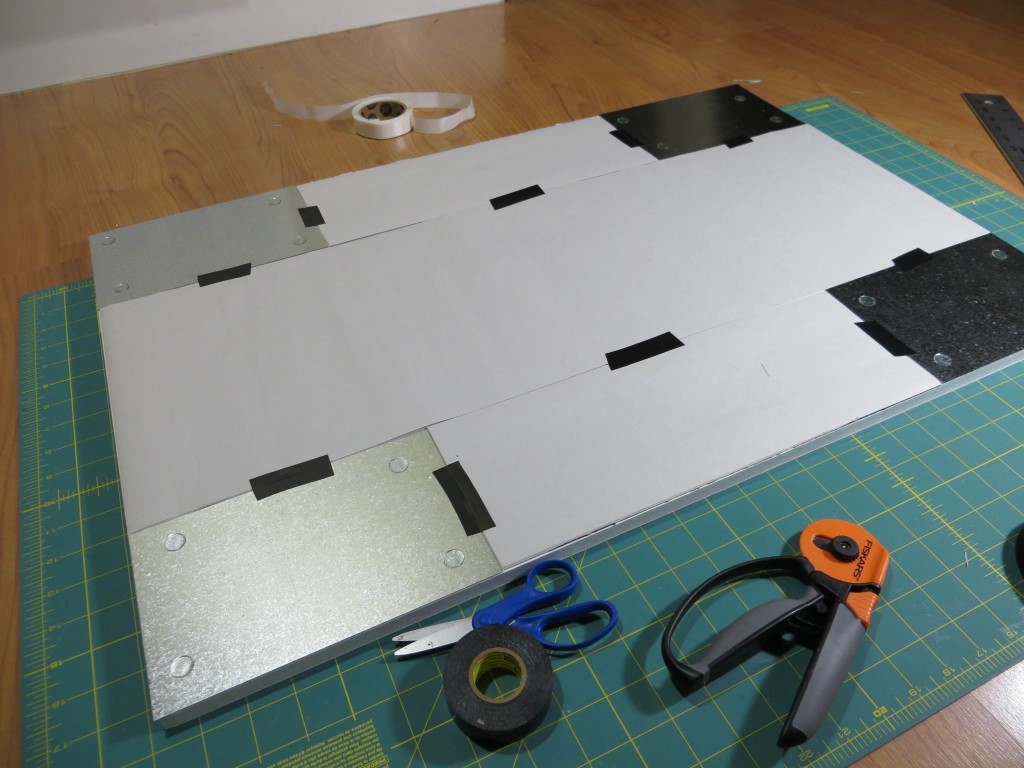
1. Use double-sided tape, glue, or glue dots to attach the four shingles to the foam core. Each shingle should be in a corner with its edges flush with the edges of the foam core.

2. Place layers of newsprint shims into the cross-shaped area not covered by the shingles. Depending on the thickness of the shingles, you will need 5 to 7 layers of newsprint. Be sure to tape the newsprint in place so that it cannot slide out of the drawing board.

3. Use double-sided tape, glue, or glue dots to attach the presentation board to the top of the stack.

4. Tape about 7 sheets of newsprint padding on top of the presentation board. I have found that taping down all four edges of the newsprint can lead to an uneven surface over time as the newsprint wicks moisture from the air and expands. If you only tape down the top edge, the newsprint can expand and still hang flat without and buckling.

Your light-weight and low-cost magnetic drawing board is now ready to use. For the best results use the super-strong rare-earth neodymium disc magnets.